
TrailMed K-Tape | Support | Upper Legs
Unlock the benefits of TrailMed K-Tape for upper leg support!
Please choose the area you'd like to tape below to access our easy-to-follow guide, video tutorial, and quick-reference image steps. Master K-Taping and find the support you need!
Quads Support
TrailMed K-Tape is a valuable tool for athletes, providing support and pain relief for the quadriceps. This taping method is ideal for cyclists, runners, and walkers who often experience muscle fatigue, strains, or injuries in their quads. Properly applying K-Tape can help stabilise the muscles, reduce pain, and enhance performance.
Follow these simple steps to tape your lat quads:
Clean and Dry: Ensure the outer thigh area is clean and dry to help the tape adhere better and stay in place longer.
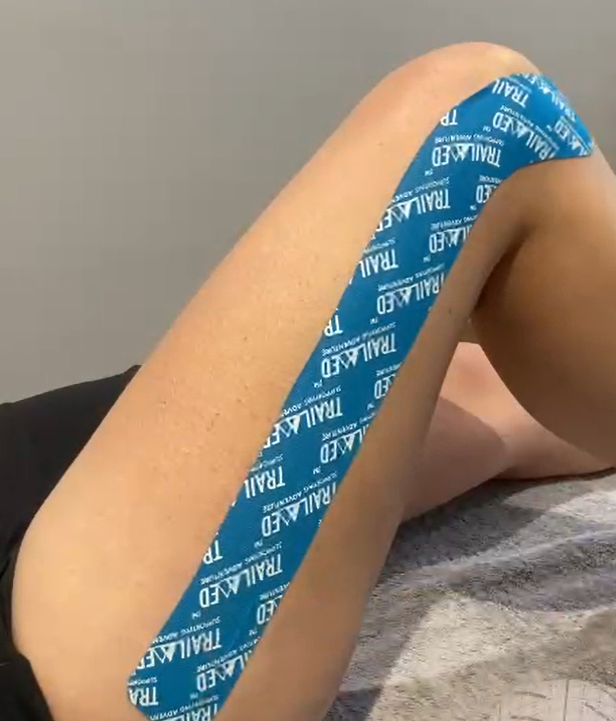
Measure and Cut: Cut one piece of K-tape long enough to cover the length of your lateral quadriceps muscle, which runs along the outside of your thigh, from just above your knee to just below your hip. Round the corners of the tape to prevent it from peeling off easily.
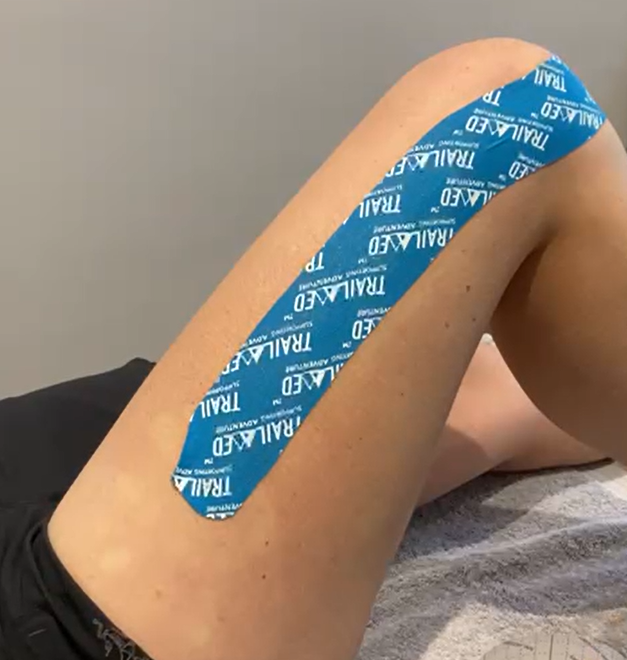
Anchor the Tape: On the lateral quad with your leg slightly bent, start by anchoring one end of the tape just above your knee outside your thigh, without any stretch. Extend the tape upwards along the lateral quad muscle, applying a light to moderate stretch (around 25-50%) as you go. Finish anchoring the other end of the tape just below your hip, again without any stretch.
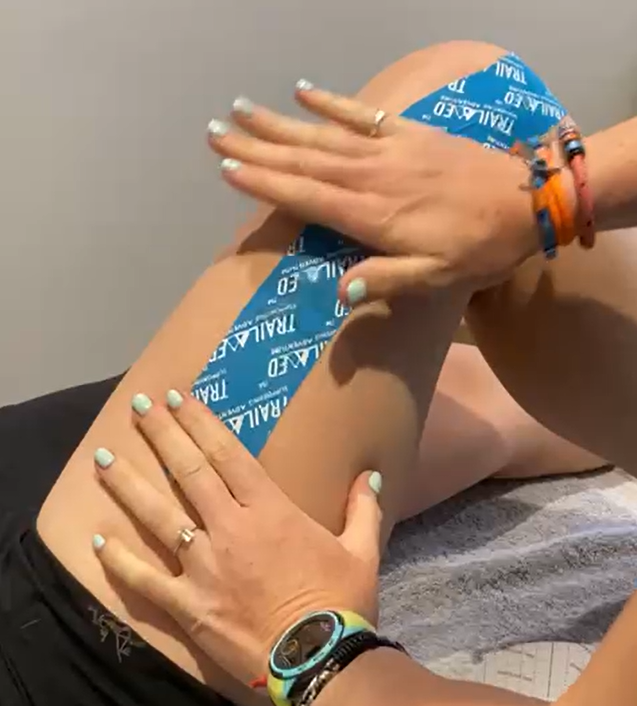
Smooth the Tape: Make sure the edges are securely adhered to your skin. Gently press down the entire length of the tape to ensure it sticks well, and check comfort by bending and straightening your leg gently to ensure the tape feels supportive without restricting your movement.
Need extra help?
View the video, follow the step-by-step images or download the guide; you’ll be a taping pro soon!
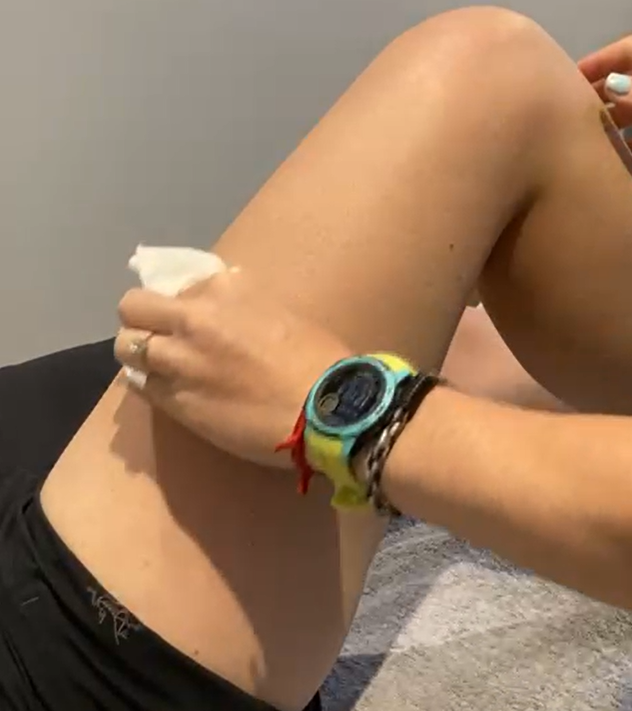
Step 1 | Clean and Dry

Step 2 | Measure and Cut
Step 3 | Anchor and Apply

Step 4 | Smooth the Tape
Discover more tips and guides by heading back to the K-Tape How-To Home Page!
Hamstrings Support
TrailMed K-Tape is a valuable tool for athletes, providing support and pain relief for the hamstrings. This taping method is ideal for cyclists, runners, and walkers who often experience muscle fatigue, strains, or injuries in their hamstrings. Properly applying K-Tape can help stabilise the muscles, reduce pain, and enhance performance.
Follow these simple steps to tape your hamstrings:
Clean and Dry: Ensure the back of your thigh is clean and dry to help the tape adhere better and stay in place longer.
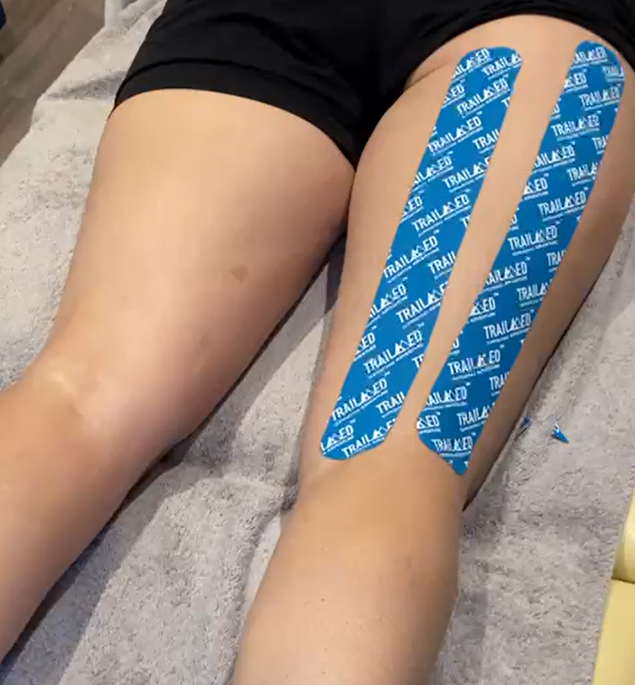
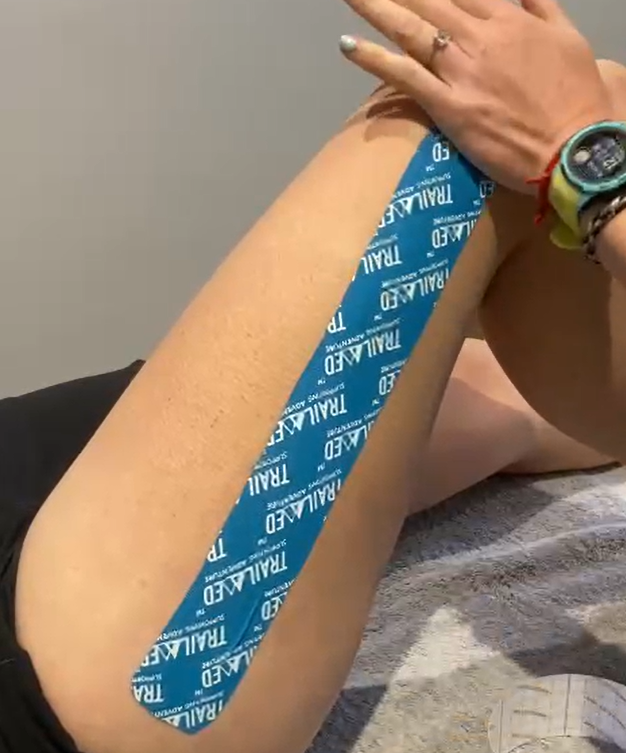
Measure and Cut: Cut two pieces of K-tape long enough to cover the length of your hamstring muscle, generally from just above the back of your knee to just below your buttock. Round the corners of the tape to prevent it from peeling off easily.
Anchor and Apply: Slightly bend your knee to stretch the hamstring. Anchor one end of the first piece of tape just above the back of your knee, without any stretch. Apply the tape with a light to moderate stretch (around 25-50%) as you follow the path of your hamstring muscle upwards towards your buttock. Apply the last inch or two of the tape without any stretch. Repeat with the second strip, ensuring it runs parallel to the first.
Smooth the Tape: Make sure the edges are securely adhered to your skin. Gently press down the entire length of the tape to ensure it sticks well. Check comfort by gently straightening and bending your leg to ensure the tape feels supportive without restricting your movement.
Need extra help?
View the video, follow the step-by-step images or download the guide; you’ll be a taping pro soon!

Step 1 | Clean and Dry

Step 2 | Measure and Cut

Step 3 | Anchor and Apply

Step 4 | Smooth the Tape
Discover more tips and guides by heading back to the K-Tape How-To Home Page!
IT Band Support
TrailMed K-Tape is a valuable tool for athletes, providing support and pain relief for the IT (Iliotibial) band. This taping method is ideal for cyclists, runners, and walkers who often experience muscle fatigue, strains, or injuries in their IT band. Applying K-Tape can help stabilise the muscles, reduce pain, and enhance performance.
Follow these simple steps to tape your IT band:
Clean and Dry: Ensure the outer thigh area is clean and dry to help the tape adhere better and stay in place longer.
Measure and Cut: Cut one piece of K-tape long enough to run from just above the outside of your knee, up along the outside of your thigh, towards your hip. You might need to experiment to find the exact length that works best for you. Round the corners of the tape to prevent it from peeling off easily.
Anchor and Apply: With your leg slightly bent, start by anchoring one end of the tape about 2-3 inches above the outside of your knee, without any stretch. Apply the tape with a moderate stretch (around 50-75%) as you extend it upwards along the outside of your thigh, towards your hip. The stretch should be applied over the tightest part of your IT band. Apply the last inch or two of the tape near your hip without stretching.
Smooth the Tape: Ensure the edges are securely adhered to your skin. Gently press down the entire length of the tape to ensure it sticks well, and check comfort by bending and straightening your leg gently to ensure the tape feels supportive without restricting movement.
Need extra help?
View the video, follow the step-by-step images or download the guide; you’ll be a taping pro soon!

Step 1 | Clean and Dry

Step 2 | Measure and Cut
Step 3 | Anchor and Apply

Step 4 | Smooth the Tape
Discover more tips and guides by heading back to the K-Tape How-To Home Page!